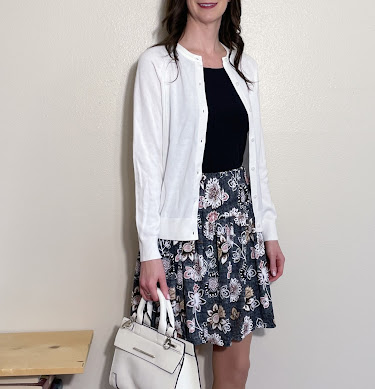
Favorite Spring Skirt (Tutorial)
This was a “love at first sight” project - you know, the kind where you out-of-the-blue see a fabric and just know it’s exactly what you want? This was just a remnant I spotted and thought would make a perfect skirt (confession time: I actually bought the fabric and made this skirt last fall. Remember this headband? Made from a leftover scrap when the skirt was done. But it wasn’t the right time of year to wear it, so I’ve been waiting to show it off!). I love how swishy and light it feels - very feminine and pretty! It goes beautifully with a pink shirt I already owned, but it looks good with black and white too, and I ran across a tan cardigan that works as well.
I didn’t use a pattern for this; I simply measured out my pieces. The top piece was 8” bigger than my hips by 6” long, and the bottom two times longer than the top piece by 14” wide. (So, for example, if your hips measure 38”cut the piece 46” by 6”; cut the other piece would be 92” by 14”). I started by sewing each of the lengths into a separate circle (one circle 6” tall, the other 14” tall). I then put a casing at the top of the 6” piece to hold the elastic (I used 1" elastic for the waistband). I then ran two rows of basting stitches around the top of the 14” piece, and then pulled that in to match the size of the 6” piece. Pin it right sides together and sew. Pull out basting stitches, and put a 1/2” hem in the bottom of the 14” piece and your skirt is done!
I didn’t give instructions for finishing off any of the seams as I used a knit fabric, but you could use a serger or your favorite method to finish this off if you used woven fabric.
(And if you did want a pattern, Burda 5978 would work.)


